Breathing New Life into a Sega Game Gear:
A Full Refurbishment Journey
PROJECTS
The Doctor
3/24/20263 min read
Breathing New Life into a Sega Game Gear: A Full Refurbishment Journey
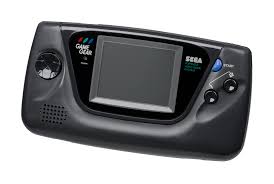
There’s something magical about the Sega Game Gear. It’s chunky, colourful, unapologetically 90s, and it tried its absolute best to be the handheld powerhouse of its era. Sure, it chewed through AA batteries like a hungry hippo and weighed roughly the same as a small brick, but when you fired it up and saw that backlit colour screen? Pure childhood joy.
Unfortunately, time hasn’t been kind to most surviving Game Gears. Bad capacitors, dim screens, washed‑out audio, power issues — you name it, these little beasts suffer from it. So when one lands on my bench, it’s not just a repair… it’s a resurrection.
Here’s how I recently brought a tired old Game Gear back from the brink.
Step 1: Assessing the Patient
This particular unit arrived with the classic symptoms:
No sound
Very faint display
Power light flickering
Occasional refusal to turn on
A general smell of “I’ve been in a shed for 20 years”
In other words: a textbook Game Gear.
Before diving in, I always check for corrosion, battery leakage, cracked plastics, and any previous “repairs” (you’d be amazed what people do with hot glue). Thankfully, this one was untouched — just suffering from age
Step 2: The Recap — Replacing Every Electrolytic Capacitor
If you’ve ever worked on a Game Gear, you’ll know this is the big one. Sega used surface‑mount electrolytic capacitors that… well… didn’t age gracefully. They leak, they corrode, and they take the audio and video circuits down with them.
I removed all the old caps, cleaned the pads thoroughly, and installed a fresh set of high‑quality replacements. Instantly, the power stability improved — always a good sign.
Step 3: Restoring the Audio Board
The audio board on the Game Gear is notorious for failing completely. This one was no exception: silent as a grave.
After recapping the board and cleaning up the leaked electrolyte, the speaker crackled back to life. A quick test with Sonic the Hedgehog confirmed it: that iconic “SEGA!” blast was back.
Step 4: Upgrading the Screen (Optional but Highly Recommended)
The original Game Gear screen was groundbreaking in 1990… and borderline unwatchable today. Dim, blurry, and prone to vertical lines.
For this refurbishment, I installed a modern LCD kit. The difference is night and day:
Crisp, bright image
Better battery life
No more ghosting
Wider viewing angles
It transforms the handheld into something genuinely enjoyable again.
Step 5: Power Jack & Button Cleaning
The DC jack was loose, so I reflowed the solder joints and cleaned the contacts.
The buttons and d‑pad got a full clean too — 30 years of grime can make controls feel mushy.
A bit of isopropyl, some gentle scrubbing, and the Game Gear felt snappy again.
Step 6: Shell Restoration
The shell had scratches and a bit of yellowing. Nothing too dramatic, but enough to warrant attention.
Cleaned with warm soapy water
Polished the screen lens
Treated the plastics to restore some shine
If the shell had been worse, I’d have gone for a full reshell — plenty of gorgeous aftermarket options exist now.
The Final Result
Once reassembled, the Game Gear powered up instantly. Bright screen, loud audio, stable power, and controls that felt brand new. It’s always satisfying seeing a console that once looked destined for the bin suddenly spring back to life.
There’s something special about these refurbishments. You’re not just fixing a device — you’re preserving a piece of gaming history. And when that Sega logo pops up in full colour, it’s hard not to smile.
Thinking of Restoring Your Own Game Gear?
Whether you’ve got a childhood unit gathering dust or you’ve picked up a “for parts” bargain online, a Game Gear refurbishment is absolutely worth doing. With fresh caps, a modern screen, and a bit of TLC, these handhelds become fantastic little machines again.
If you’d like yours restored, modded, or fully refurbished, you know where to find me — the Device Doctor is always happy to bring another classic back to life.
Social Media
Stay connected with the latest repairs, projects, and updates.
Find all official Device Doctor social links below and join the community
Contact
Newsletter
thedoctor@thedevicedoctor.net
0418588023
© 2026. All rights reserved.